Gutter guard installation is a smart way to help reduce the risk of clogged gutters, water overflow, and expensive structural damage. However, many homeowners still ask how to install gutter guards correctly and what the process involves. Understanding the full gutter guard installation process helps you choose the right materials, avoid common mistakes, and support long-term performance. In this article, we break down each step in a clear and simple way. Whether you are considering professional installation or simply want to understand the process, this guide offers a helpful overview of how gutter guard systems are typically installed.
What Are Gutter Guards and Why Do They Matter?
Gutter guards are specially designed covers that sit over your gutters to help reduce leaves, dirt, and debris from causing blockages. At the same time, they allow rainwater to flow through the system more effectively. Proper gutter guard installation can help reduce debris buildup, support drainage, and lower the frequency of gutter cleanings, although periodic maintenance is still important.
Types of Gutter Guards Used in Installation
- Mesh Gutter Guards: Fine metal screens that help block small debris while allowing steady water flow.
- Screen Gutter Guards: Simple, lightweight, and cost-effective for basic protection.
- Reverse Curve Guards: Use surface tension to direct water in and help direct debris away.
- Foam Inserts: Sit inside gutters and help filter debris while letting water pass through.
- Brush Guards: Cylindrical brushes that reduce leaf and debris buildup.
Tools and Materials Needed
- Ladder with stabilizer: Provides safe and steady access to the gutter line.
- Work gloves and safety glasses: Protect hands and eyes during installation.
- Drill or screwdriver: Secures gutter guards firmly in place.
- Tin snips or utility knife: Allows clean and accurate cutting.
- Measuring tape: Ensures precise sizing and proper alignment.
- Screws or clips: Fasten guards securely based on the guard type.
Step-by-Step Process for Gutter Guard Installation
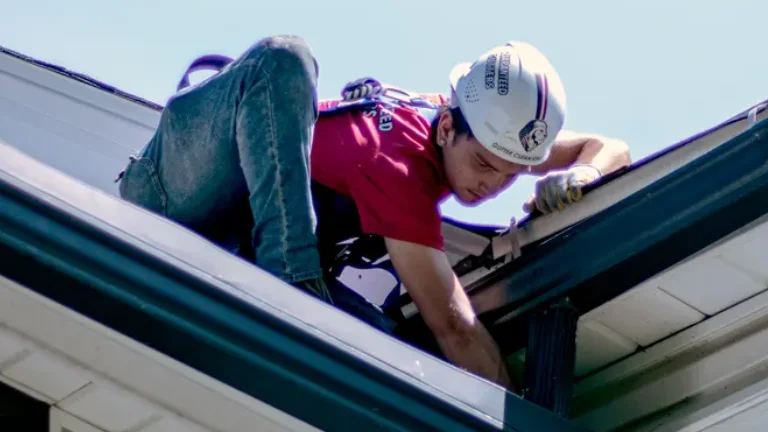
Gutter guard installation follows a proven process used by both homeowners and professional gutter teams. While some DIY gutter guard installation options are easy to install, others require professional installation, especially when working with roof shingles or complex gutter systems.
Step 1: Inspect and Clean the Gutters
Before installing any gutter protection system, take time to clean your gutters thoroughly. Remove leaves, dirt, and debris from inside the gutter, as clogged gutters and downspouts can affect performance. Without gutter guards, regular gutter cleaning is required, so starting clean is essential.
Step 2: Check Roof and Gutter Condition
Next, inspect the gutter lip, fascia, and roof shingles for damage. Repairs should be completed first to avoid future gutter damage. Whether working on existing gutters or as part of a new gutter system, a solid base improves gutter lifespan and long-term gutter protection.
Step 3: Measure and Cut the Gutter Guards
Measure the length of the gutter carefully. Then, cut the gutter guards to fit each gutter section. This step applies to mesh guards, gutter screens, micro-mesh gutter guards, foam gutter guards, and brush gutter guards. Proper sizing helps guards fit securely along the front of the gutter.
Step 4: Position the Gutter Guards
Different gutter guard systems are installed in different ways. Some sit inside the gutter, while others attach along the edge or integrate near the top of the system. Because fit and roof-edge compatibility can vary, some installations are better handled by a professional.
Step 5: Secure the Guards Properly
Attach the guards using screws, clips, or brackets, depending on the type. Micro-mesh guards, gutter covers, and gutter screens must be secured evenly to help reduce debris entering gutters while allowing water to flow freely. Guards are made to protect the right gutter when installed correctly.
Step 6: Test Water Flow
Finally, water flow should be checked after installation. Properly installed gutter guards can help improve drainage and reduce debris buildup, but adjustments may still be needed if water is not flowing as expected.
Professional vs DIY Gutter Guard Installation
| Factor | DIY Gutter Guard Installation | Professional Gutter Guard Installation |
| Cost | Lower upfront cost using DIY kits | Higher initial cost with long-term value |
| Installation Skill | Basic skills required for simple systems | Expert-level installation for all guard types |
| Best For | Foam, brush, and basic screen guards | Micro-mesh and reverse-curve gutter guards |
| Time Required | Several hours or multiple days | Completed efficiently in a single visit |
| Safety Level | Higher risk due to ladder and roof access | Safer, handled by trained professionals |
| Fit and Alignment | May vary based on experience | Precise fit and correct gutter slope |
| Roof Compatibility | Limited understanding of roof systems | Proper handling of roof shingles and edges |
| Warranty Coverage | Rarely included | Often includes product and labor warranties |
| Long-Term Performance | May require adjustments | Reliable, long-lasting gutter protection |
| Maintenance Needs | More frequent checks | Reduced maintenance over time |
Common Installation Mistakes to Avoid
Even the best gutter guards can fail if they are installed incorrectly. One common mistake is installing guards on dirty gutters, which prevents proper seating and drainage. Incorrect spacing or poor alignment can also block water flow and cause overflow. In addition, using the wrong fasteners may loosen the guards over time. Ignoring roof and gutter compatibility is another critical error, often leading to leaks, sagging, and reduced gutter protection performance.
How Long Does Gutter Guard Installation Take?
The time required for gutter guard installation depends on the size of your home, the type of gutter guards, and whether you choose DIY or professional installation. Simple DIY systems may take a few hours to install, while more complex options, such as micro-mesh or reverse-curve guards, can take longer. Professional installation is usually completed in a single visit, ensuring accurate fitting, proper water flow, and long-lasting gutter protection.
Benefits of Proper Gutter Guards Installation
- Help reduce debris buildup and support water flow through the gutter system.
- Reduce cleaning frequency and minimize the need for regular gutter maintenance.
- Help direct rainwater away from the home more effectively.
- Support gutter performance during heavy rainfall and storms.
- Extend gutter lifespan by reducing stress, corrosion, and long-term wear.
Maintenance After Gutter Guard Installation
Gutter guards greatly reduce the need for frequent gutter cleaning, but they are not completely maintenance-free. Occasional inspections help ensure debris does not collect on top of the guards or block water flow. A light rinse with water and quick visual checks, especially after heavy storms, keep the system working efficiently. Regular maintenance helps preserve gutter performance, prevent hidden issues, and extend the life of your gutter protection system.
Conclusion
Gutter guards greatly reduce the need for frequent gutter cleaning, but they are not completely maintenance-free. Occasional inspections help ensure debris does not collect excessively on top of the guards or block water flow. A light rinse with water and quick visual checks, especially after heavy storms, keep the system working efficiently. Regular maintenance helps preserve gutter performance, prevent hidden issues, and extend the life of your gutter protection system.
Keep Your Gutters Flowing Smoothly
Gutter guards can help reduce the risk of clogs, water-related issues, and costly repairs. If you are considering gutter guards for your home, our team can help you understand the options and determine the best next step.
Call Now!